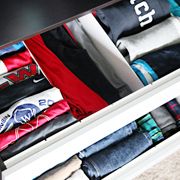
To say these little things really excite me is an understatement. I selected a new unit for our son's closet that offered up five large drawers of storage, but those large drawers needed a little division to prevent them from becoming full-on jumbled messes down the road. This super quick and easy project was born out of a need that wasn't being met by retailers, and also by giving myself a few days to let my ideas swirl.

You can see the most recent photos of the closet in this post here; the interior measurements of the drawers come in at 25 1/2" x 21". That is a LOT of drawer area! And I really didn't realize it until I put some of his clothes inside and started looking for interior organizers and dividers. So much new space to play with!
I considered quite a few options, and the ultimate goal was to add front-to-back dividers to all of the drawers to categorize the articles of clothing by type.
We have DIY'd quite a few drawer organizers over the years (I will link those projects below), but none of our previous methods were standing out as great options here. Although it seems simple enough to add a divider down the center of a drawer, there are a lot of ways to achieve this, but most are permanent. Especially if you are looking for something that is a bit sturdier. My objective was to do something easy, not construction heavy, and not permanent to the drawer. He is a growing boy and how the drawers are used is sure to evolve over the years.
I have seen expandable dividers on the market, and they were my "go to" for this project. But the more I searched, the more I realized that they are generally A) costly and B) don't fit the full depth of these larger drawers. I also needed 6-7 dividers, and when I started adding all of those up, it seemed a bit silly to spend $50+ on something to hold shirts in place.

And that is when I came up with the idea to use cord clips! I have used them to hold toothbrushes, pens and of course, cords, so why not a slim piece of wood? It just might work!
The best part is that the adhesive on the rubber cord clips can be removed from any surface (sometimes with a little help from rubbing alcohol or heat), or the clip can be used with a Command Strip as well. No commitment required.
So I did a little online searching and shopping and found a pack of twelve for $7 with free shipping. I quickly placed my order and went to Home Depot to search for thin wood options. (Note: There are plenty of more expensive options in terms of the rubber cord clips, but for this type of project, these worked great for us and I didn't notice a difference in quality when compared to others I have used in the past.)
Could you use foam core? Probably! But I really wanted something sturdy. I have used foam core in the past, and while it is a cheap and great option, it doesn't always stand the test of time. And with a careless kiddo, I ruled that out quickly.
I found a few inexpensive wood types to select from (like this, this and this), but ultimately decided the biggest bang for my buck was to purchase a couple of these boards and cut them down to size. That way I could take advantage of both the height and width I wanted and get two full dividers from a single piece of craft wood. (You may also have luck finding easy-to-cut options at craft stores.)

We cut the boards to just shy of the drawer height and width and sanded down the edges to a smooth finish.
Quick Tip: You can also have the wood cut for you at Home Depot (you may just want to be prepared to still do a light sanding on the edges).
Then measured inside the drawer and used a pencil to mark the location of the dividers.

Using a straight edge, we drew a light line on the inside of the drawer that could later be erased/washed off. This gave us a visual of where to place the cord clips.

Once the cord clips are in place, it is as simple as inserting the wood pieces.
Quick Tip: We cut the wood about a half an inch shorter than the drawer, so it was still a tight fit. I found it easiest to place a finger under each clip when installing the wood pieces to prevent the clips from sliding down/slipping.


Once I had all of that figured out, I decided to wrap the boards with some white vinyl. They could also be stained or painted, this was just the cleanest, quickest solution at the time.


I couldn't fold and put away his clothes fast enough!


We still have some final closet details to wrap up and then I will share all of the organization and do a quick folding tutorial for the shirts. I would rather file clothes than paperwork any day!
OK, so that was a lot of words for the quickest customizable drawer divider project ever! To summarize:
Measure, cut the wood to length, mark the drawer, stick the cord grips, add the wood divider. DONE!
There are no limits to how many you can add, or the number of ways you can divide the drawer to fit your needs. This is especially helpful for those deeper drawers, like dressers and pantries, in which there may not be a lot of off-the-shelf options on the market. And the wood slats can also be customized to compliment the drawer and contents with paper, paint, stain, etc.... So many wins! Definitely my favorite DIY divider solution to date.

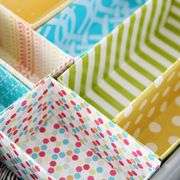
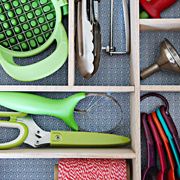
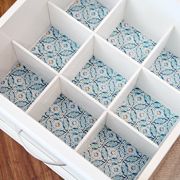
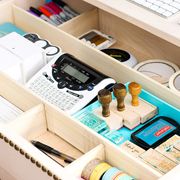
Speaking of DIY drawer dividers, as promised, below you can find a variety of alternative solutions that may better fit your project needs:
 |
 |
 |
 |
 |
 |
http://ift.tt/2FC5COu
No comments:
Post a Comment